Current Asset
IMPORT DEVICES
IMPORT DEVICES FROM A *.CSV FILE
1. click the Import Button ![]() on top of the Asset List
on top of the Asset List
2. choose your import file from your local disc and click on open
3. choose an existing import profile or create a new profile
4. check or define the import profile properties and click on "OK"
5. check or define which *.CSV columns are allocated to asset properties in mySalesDrive
6. start the import by clicking "OK"
CHECK IMPORTED DEVICES
1. after the import finished the list view changes to “Import Checking”
2. this view supports checking if every device had been imported correctly
3. the green group (matching 90-100%) shows all devices that matched with the database correctly
4. devices in the other groups, should be checked to make sure they were imported and assigned correctly
REASSIGN DEVICES
1. select device which was imported incorrectly
2. click on the “Reassign Button” ![]() on the tool bar
on the tool bar
3. in the opening dialog search for the correct device in the SalesDrive database
4. select the correct device from the list and click on "ADD SELECTED"
5. when all devices are correct, switch the style of the list to the standard table layout, by selecting this in the drop-down menu in the right corner ![]() above the list
above the list
ADD DEVICES AND MODIFY THEIR DATA/SETTINGS
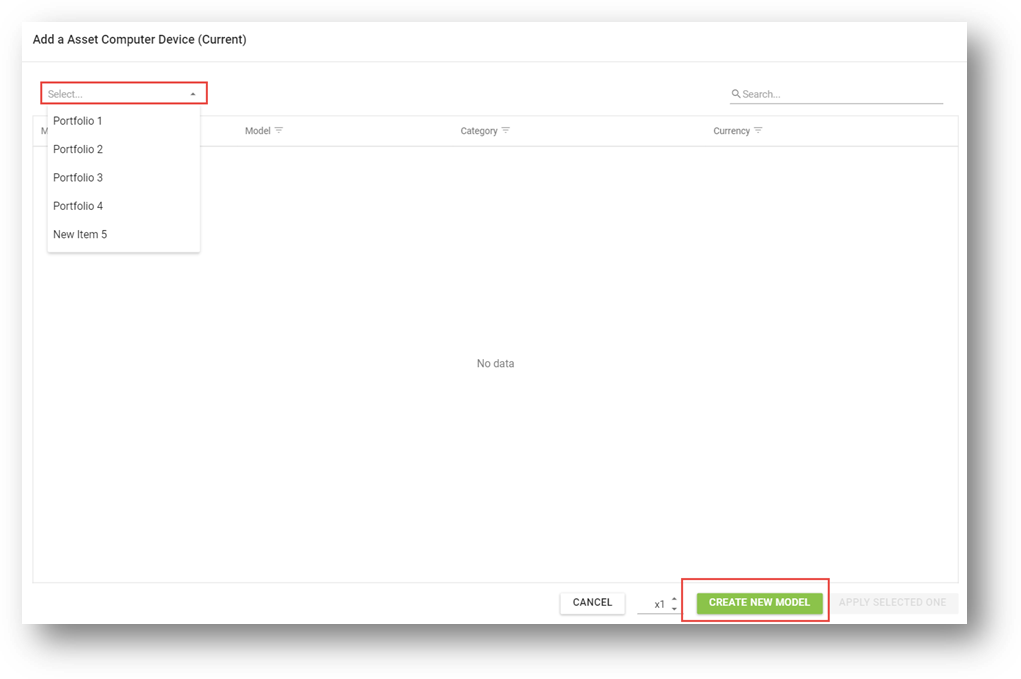
ADD DEVICES FROM THE DATABASE OR THE PORTFOLIO
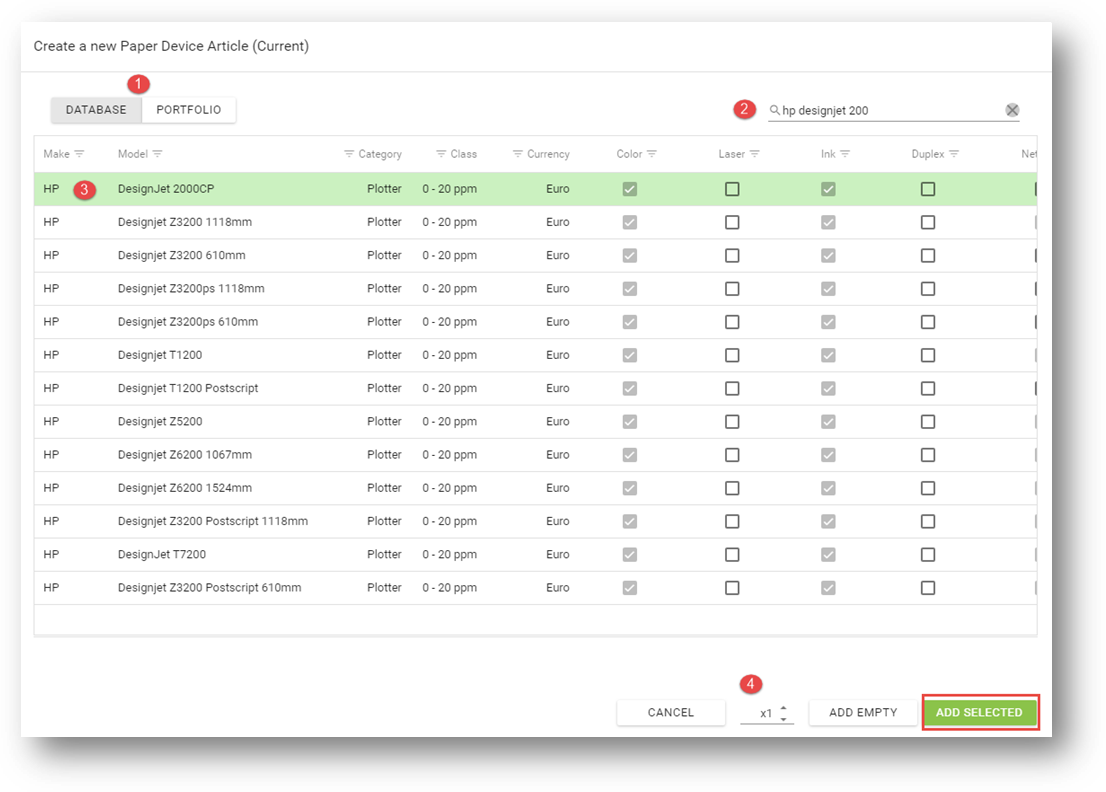
1. add a device by clicking on the Add-Button  on top of the Asset List (screen shot 1)
2. search for the correct device in the database and select it
3. adjust the number of devices if needed and click on "ADD SELECTED"
screen shot 21
CHANGE THE DEVICE IDENTITY
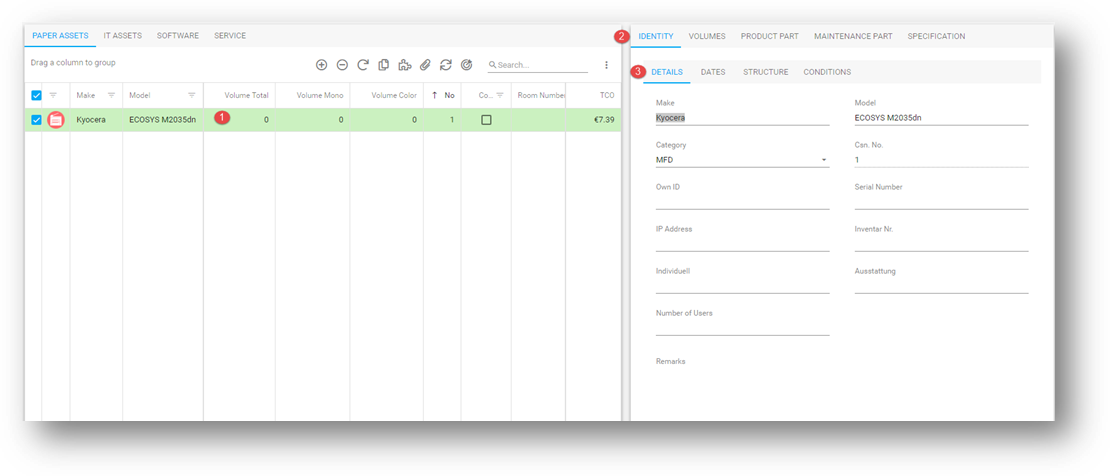
1. select the device from the asset list (screen shot 2)
2. select the “Identity” tab on the right side
3. within the identity/details tab you can change all identity values
screen shot 22
ADD A MONTHLY VOLUME TO A DEVICE
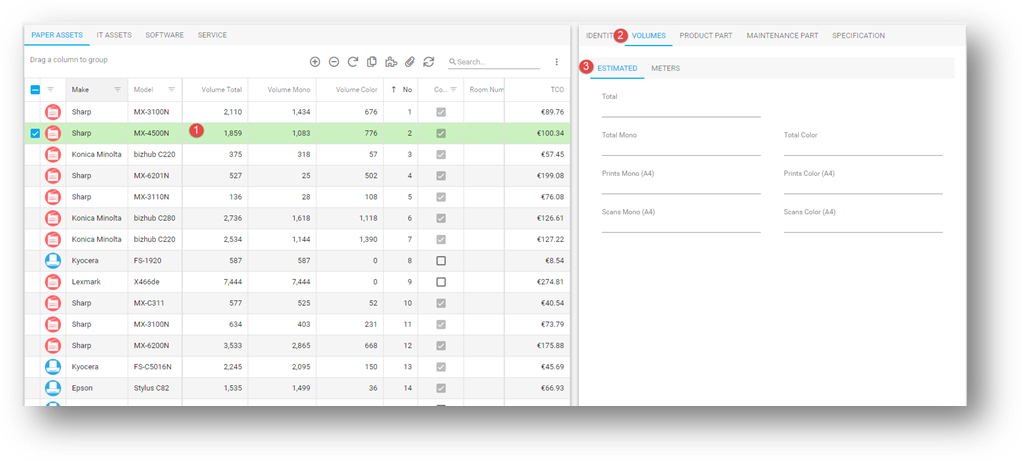
1. select the device from the asset list (screen shot 3)
2. select the tab “Volumes”
3. select the tab “Estimated”
4. enter the monthly volumes accordingly
screen shot 23
ADD A METER READING
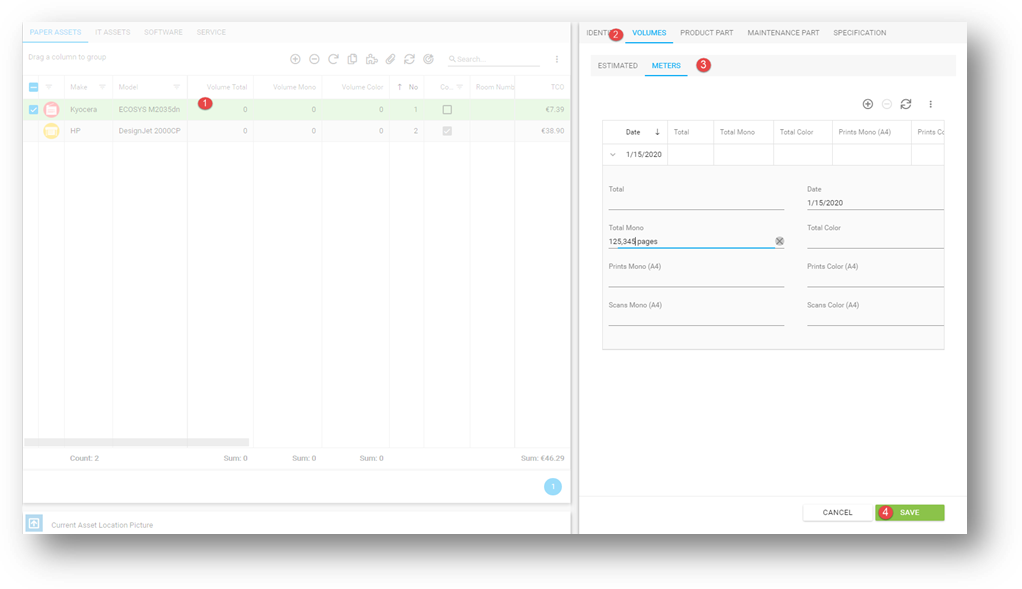
1. select the device in the asset list (screen shot 4)
2. select the tab “VOLUMES”
3. select the tab “METERS”
4. fill in the last meter reading info
screen shot 24
MONTHLY VOLUME CALCULATION
1. Constant: Average month in days = 365,25 / 12 = 30,4375....
2. Determination of the difference in days between the installation date (or date of the first meter reading, if there are several meter snapshots) and the date of the last meter reading. Example: The difference in days between 2.11.2014 and 2.10.2019 is 1795 days.
3. Calculation of the number of months as decimal number: x-day/ 30,4375= x,xxxx months
Example: 1795/ 30,4375... = 58,9833… Months
4. If the decimal part is less than 0.5 or greater than 0.95, then the whole month is rounded down or up.
Our example: 58,9833 🡪 59 months. Further examples: at 106,63 -> 107; at 106,04 -> 106;
at 106,89 -> 107; at 106,06 -> 106 etc.
5. Calculated monthly volume: meter reading / x-months = X ... (respectively rounded …per month).
Example: 128547/ 59 months = 2178,76 = 2179
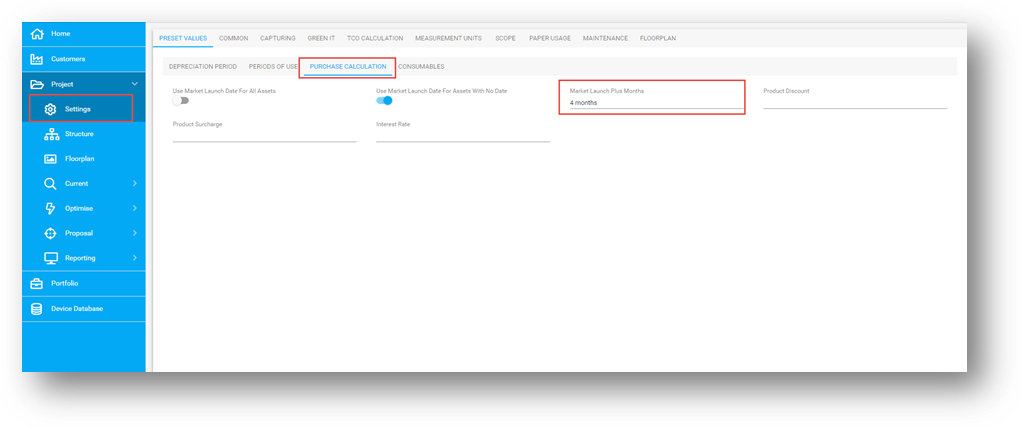
Please note! If you do not add a purchase date, by default, MSD is using the “Market Launch” + x month (as defined in the Project Settings) (screen shot 5)
screen shot 25
CHANGE CONSUMABLES
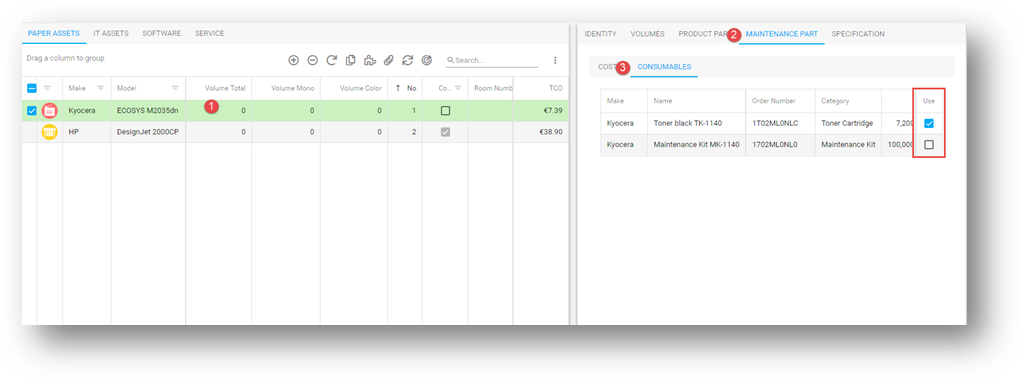
1. select the respective device of which you want to change consumables (screen shot 6)
2. select the tab “MAINTENANCE PART” and “CONSUMABLES”
3. now you can see every linked consumable which is associated to the selected device
4. to change the consumable, untick the "Use" checkbox on the right
screen shot 26
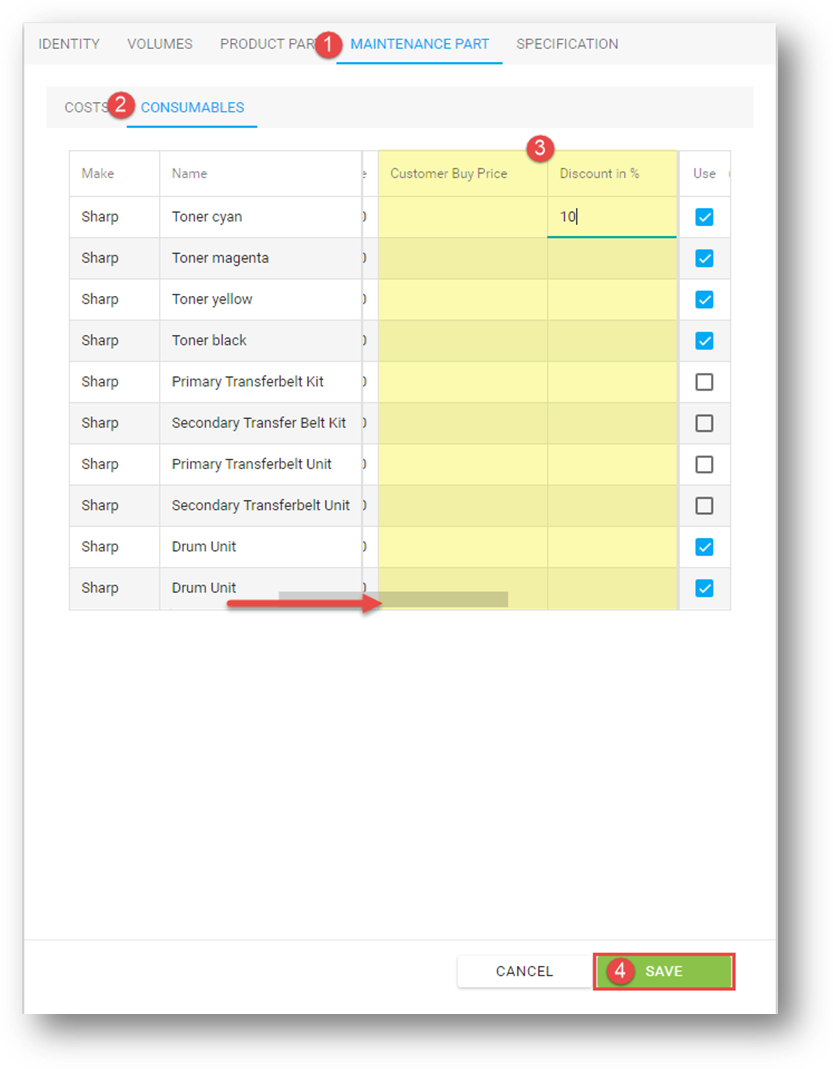
CHANGE THE COSTS OF CONSUMABLES
In this form you are able to enter prices or/and discounts directly into the form
(you need to scroll to the right). Apply your changes by clicking on save. (screen shot 7)
screen shot 27
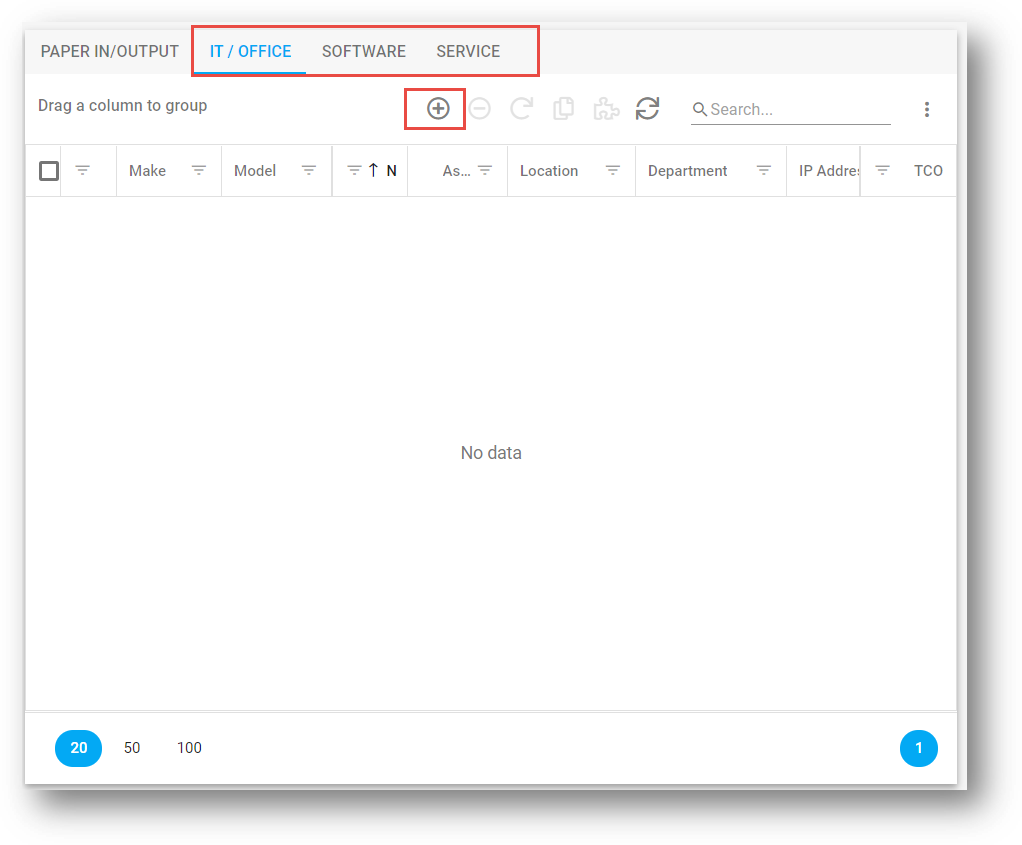
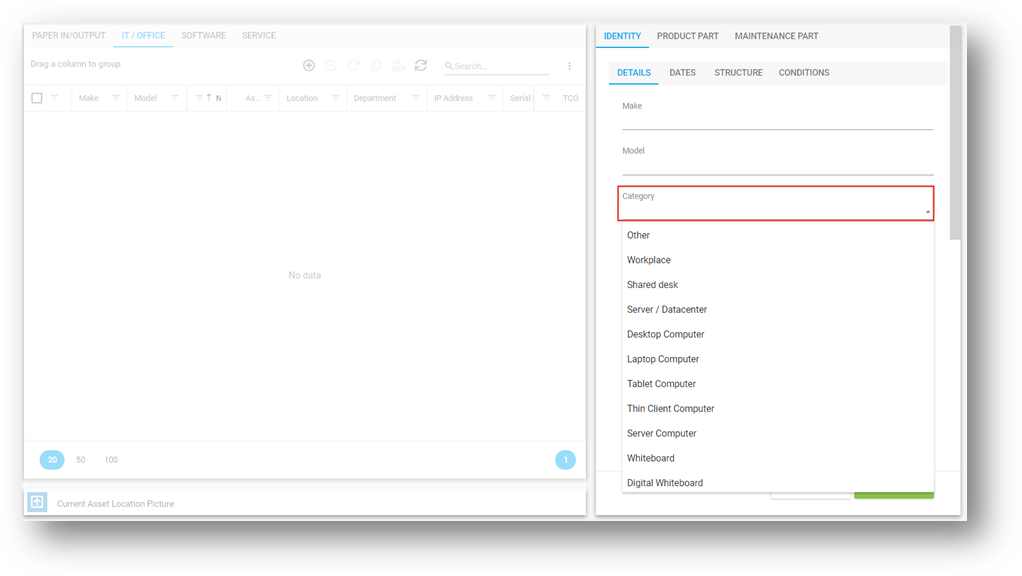
ADD IT/OFFICE, SOFTWARE AND SERVICES
1. add asset by clicking on the Add-Button  on top of the Asset List (screen shot 8)
2. select “Create New Model” or add asset from portfolio (screen shot 9)
3. add asset related information and select the correct category in the drop-down menu (screen shot 10)
screen shot 28
screen shot 29
screen shot 30