Floorplan
In this Workspace you are able to add assets to your floorplan like Paper Devices, IT-Assets as well as other items. You could also mark areas. If you haven’t uploaded a floorplan already in the previous step you can upload floorplans in this workspace.
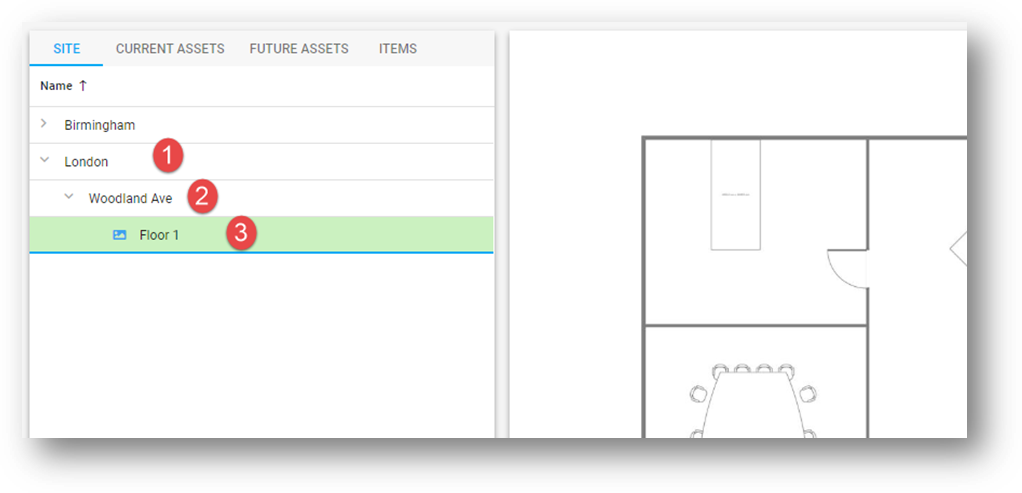
Select the floorplan you want to work with. (screen shot 1)
screen shot 1
In order for assets to be displayed in the correct size within your floorplan it is important to scale the floorplan.
SCALE THE FLOORPLAN
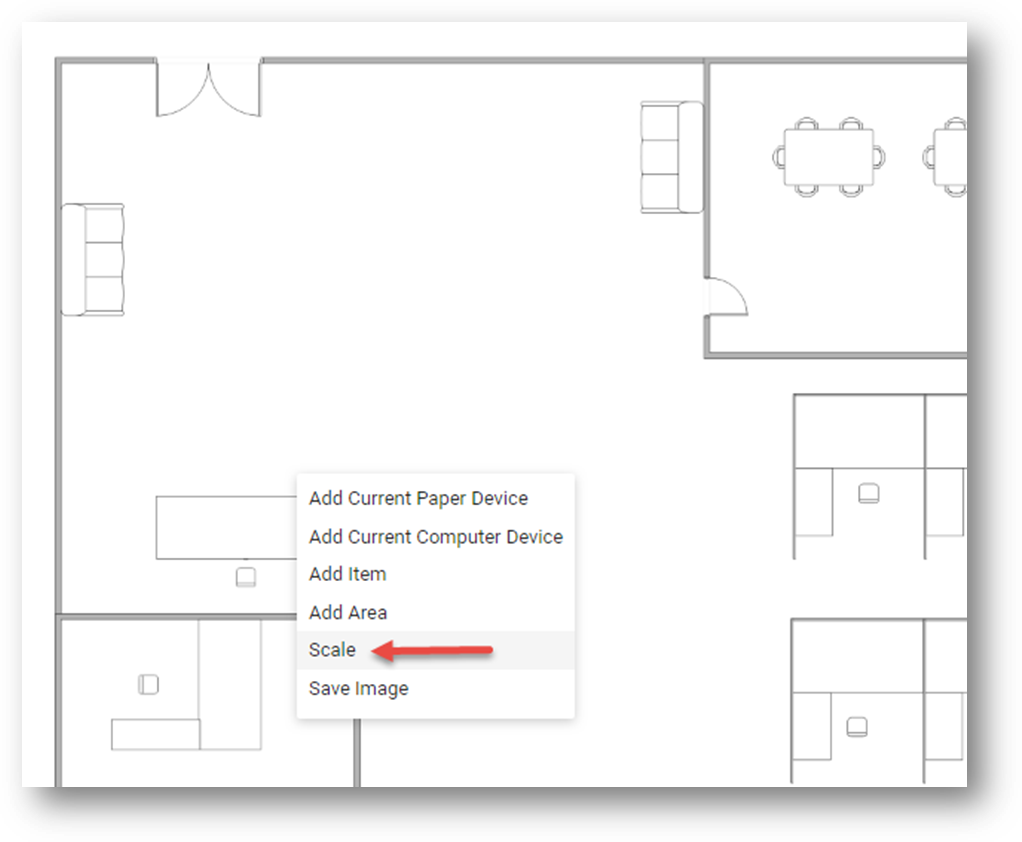
Click right on your floorplan and select “scale” (screen shot 2).
screen shot 2
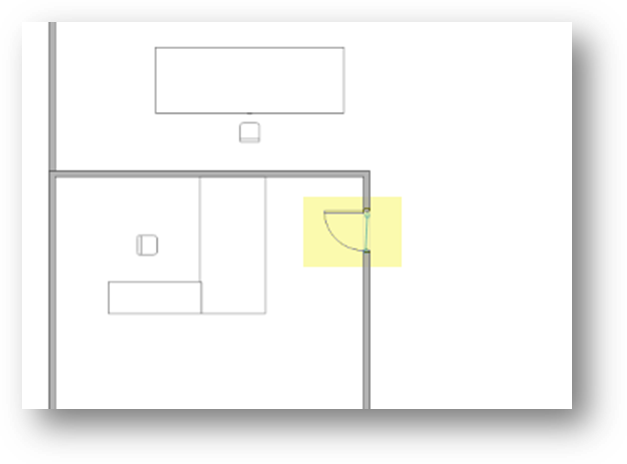
Set start and end point for scaling. Use it on something you know the length of, e.g. a door frame (screen shot 3).
screen shot 3
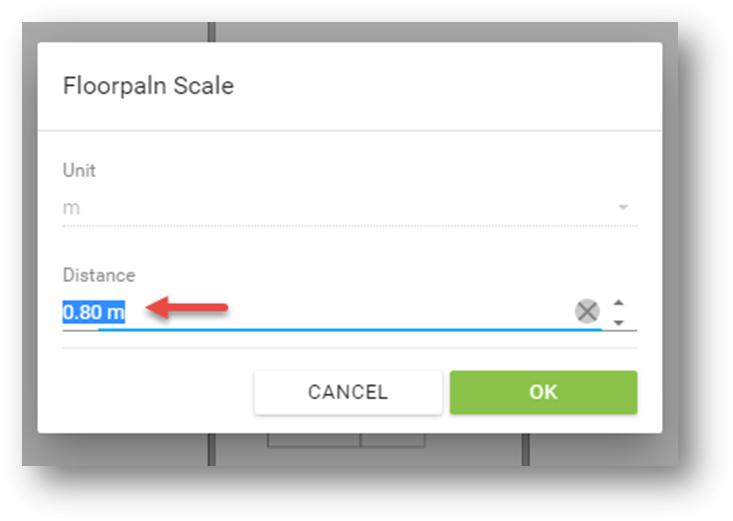
In the following dialog enter the distance between the 2 points (screen shot 4).
screen shot 4
ADD AREAS
Right-click and click on Add Area, now you can mark an area by clicking on every corner and on the beginning (screen shot 5+6).
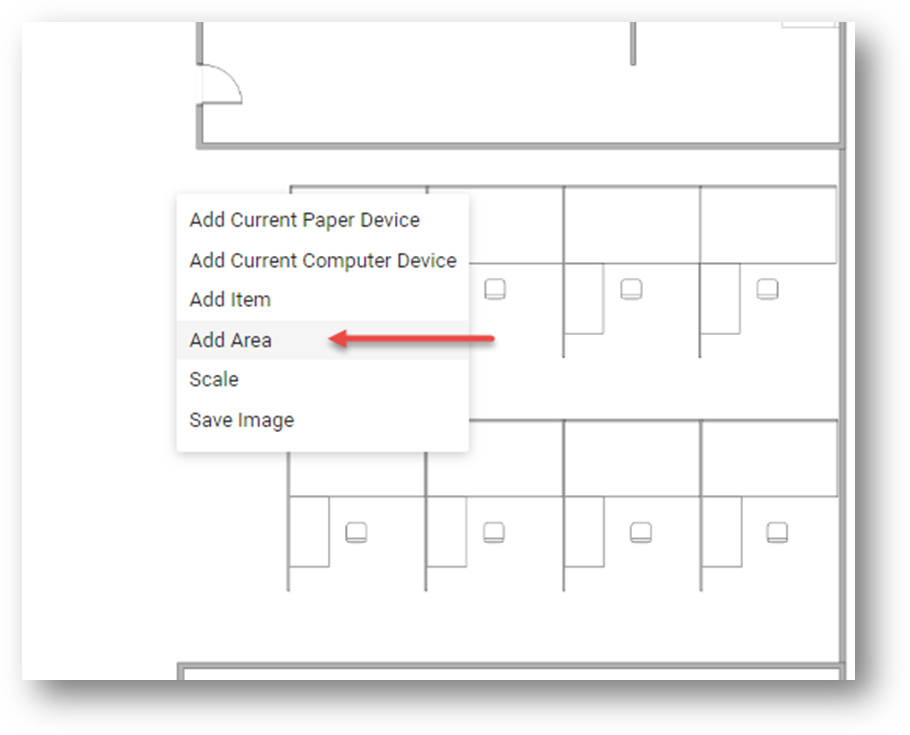
screen shot 5
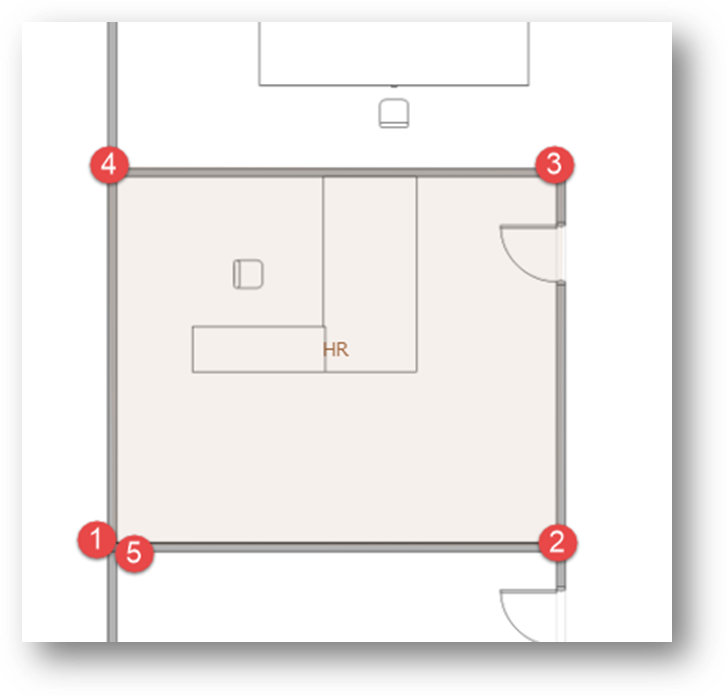
screen shot 6
After that a dialog will be displayed where you enter a Name for the area. You can also assign it to a cost center or a department (screen shot 7).
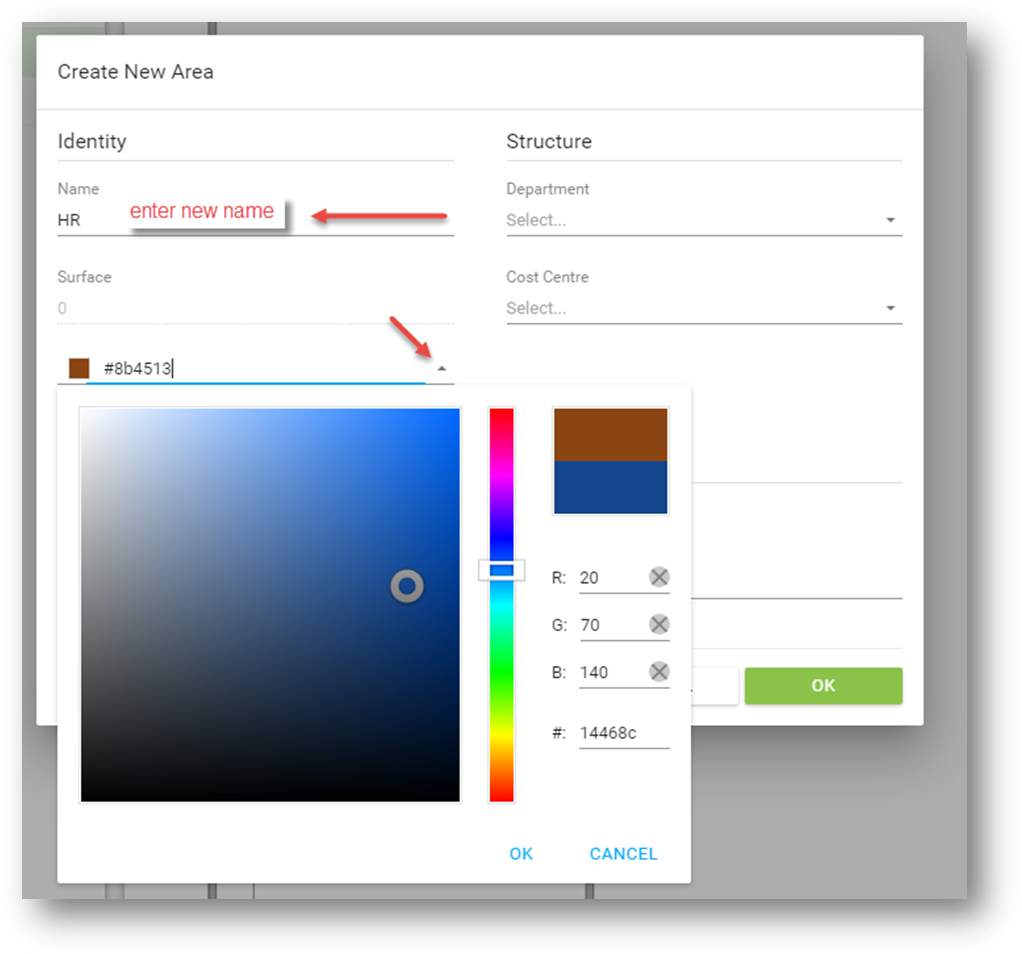
screen shot 7
FLOORPLAN SETTINGS
The floorplan workspace offers its on set of settings.
Please note that changes in those settings will only be applied to the floorplan you are currently working with. If you want to adjust the settings for all floorplans within the project, please switch to “Project Settings”.
FLOORPLAN SETTINGS AND LABELS
Click on the settings icon in the upper right corner of the floorplan to open the settings.
Here you can adjust (screen shot 8):
1. the displayed radius of the assets
2. information displayed in the asset labels
3. activate or deactivate labels
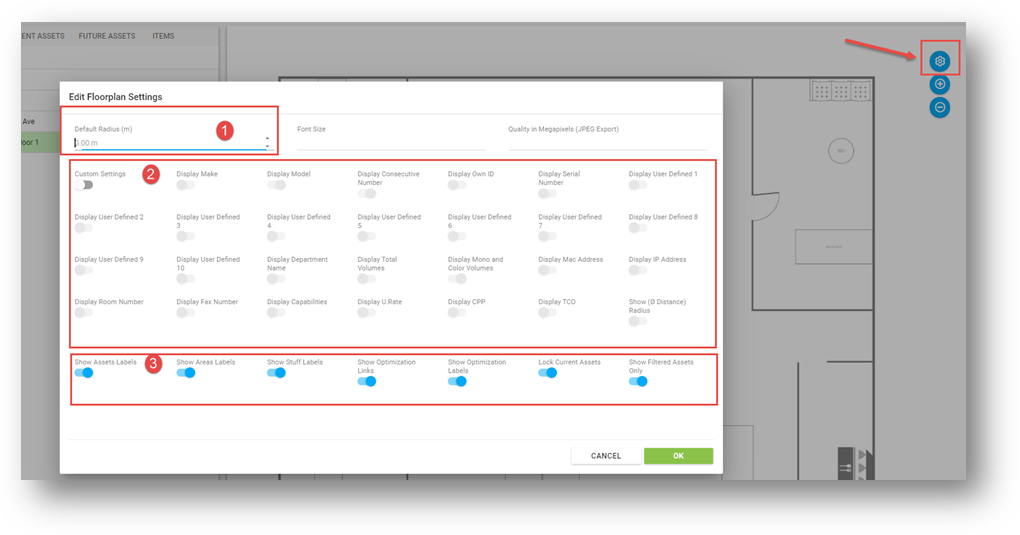
screen shot 8
VISUAL ADJUSTMENTS
You can make various visible adjustments within the floorplan (screen shot 9):
1. zoom in and out of the floorplan with the ![]() and
and ![]() icon in the upper right corner of the floorplan
icon in the upper right corner of the floorplan
2. adjust the opacity of current and future state assets labels in the left bottom corner of the floorplan
3. adjust the icon size in the right bottom corner of the floorplan
4. adjust the label front size in the right bottom corner
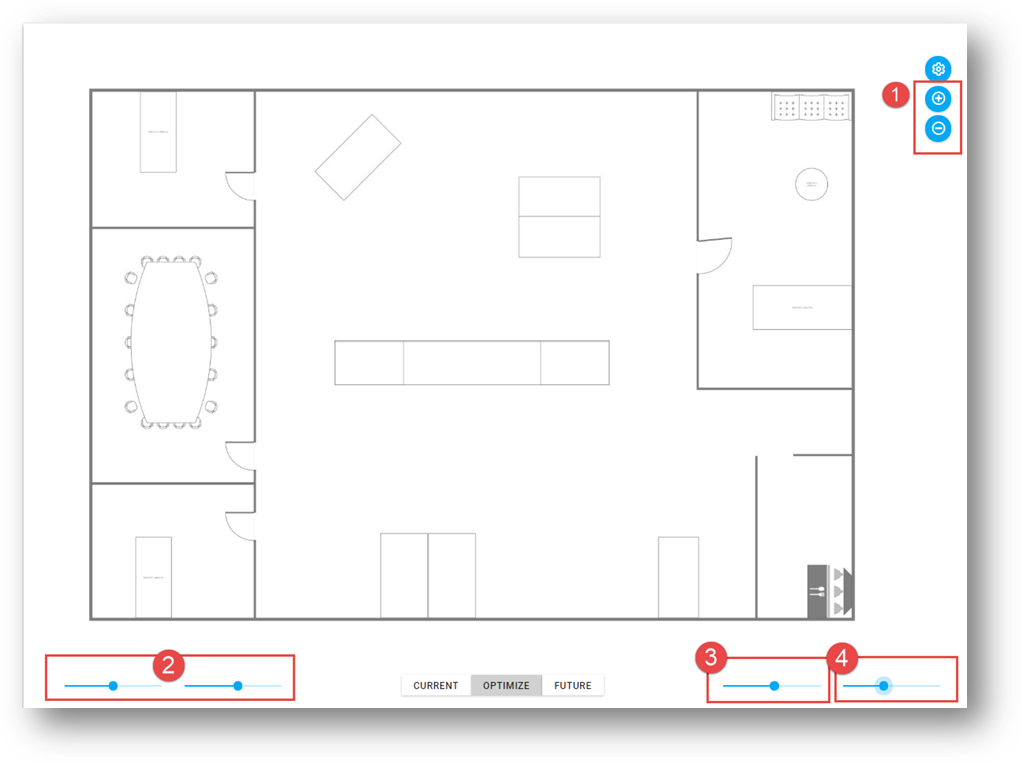
screen shot 9
ADD CURRENT ASSETS TO FLOORPLAN
Right-click on the floorplan where you want to add a Paper Device or a Computer Device (screen shot 10).
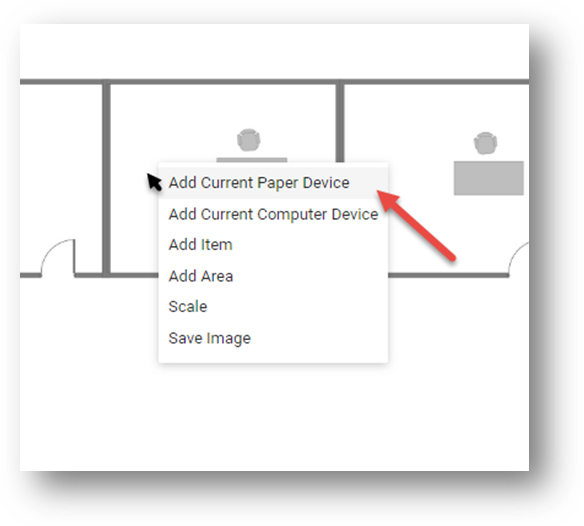
screen shot 10
Now you can choose devices from the database or the portfolio.
Select the devices, choose the amount and click on “Add selected” (screen shot 11)
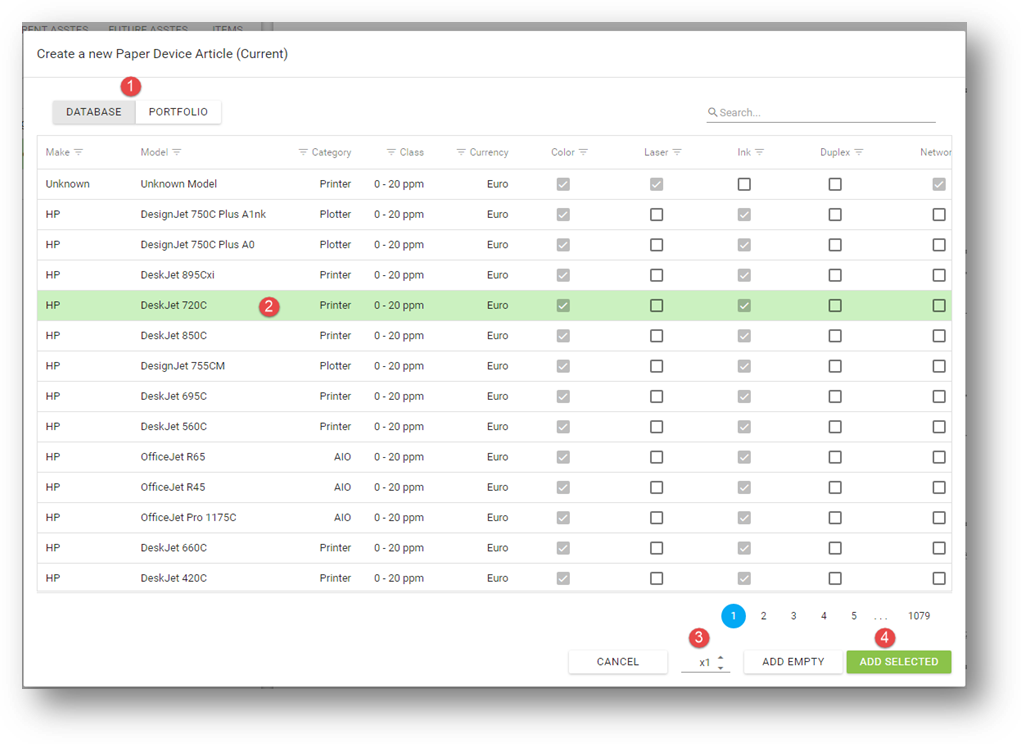
screen shot 11
You can also create a custom by selecting the amount and click on “Create New Model”. In the following Dialog you can enter your own values for the paper device or computer device (screen shot 12)
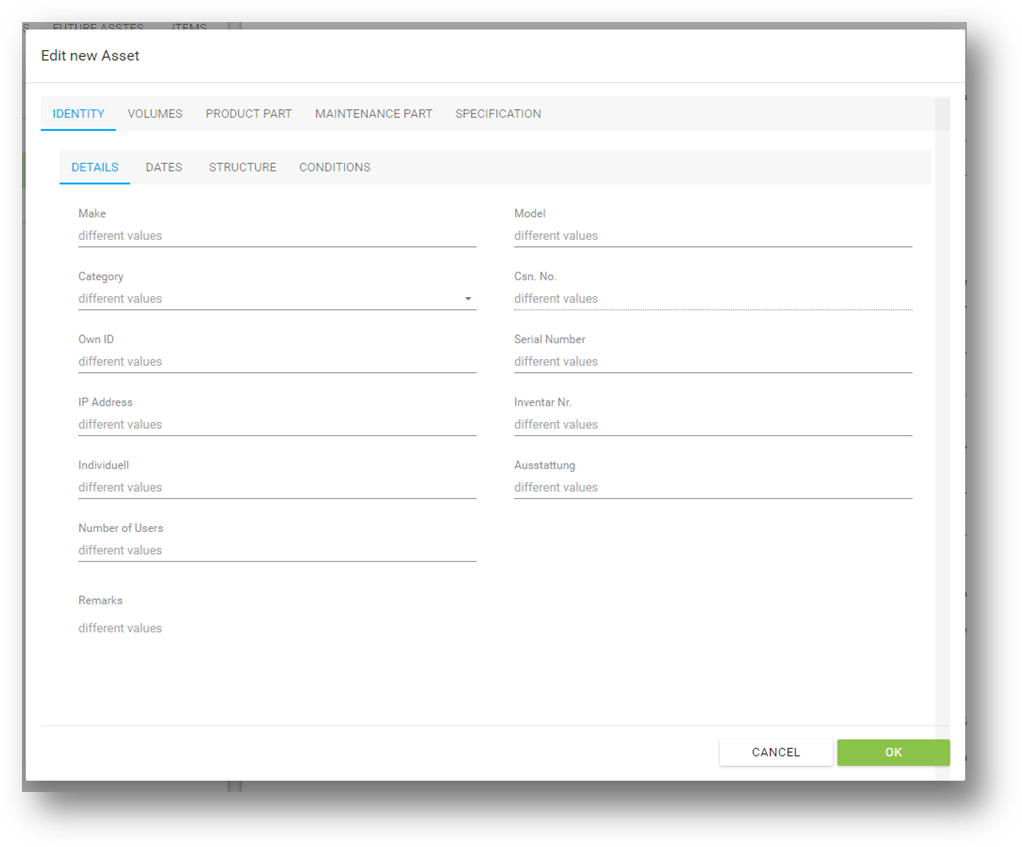
screen shot 12
OPTIMIZE THE CURRENT ASSETS:
Right-click on the current asset and on optimize (screen shot 13).
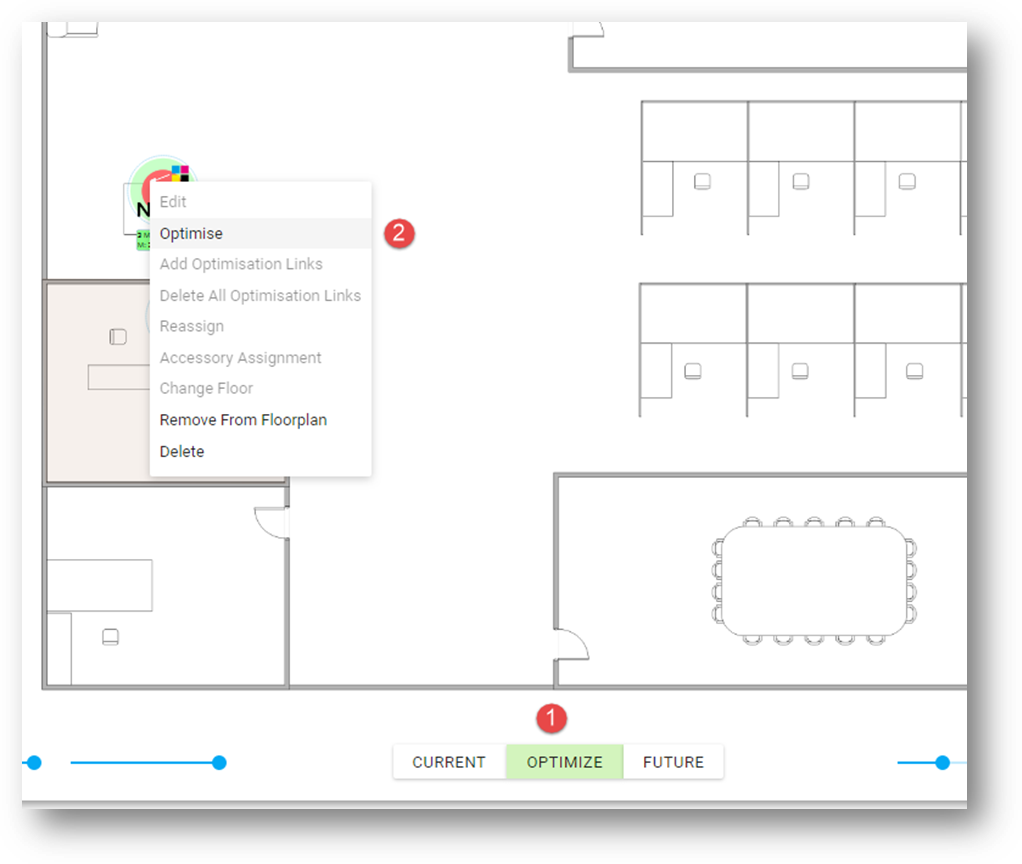
screen shot 13
You can select multiple devices by crtl + left-clicking on them and them right-click on one of them.
You will be asked if you want to (screen shot 14):
- Keep the current device(s) and transfer them to the future state.
- Replace them one by one
- Replace multiple devices bye one (only available if you selected more than one device before)
- Replace one device by multiple devices
If you select anything other than keep, a dialog opens to choose the future asset and how many in case of “one to many”
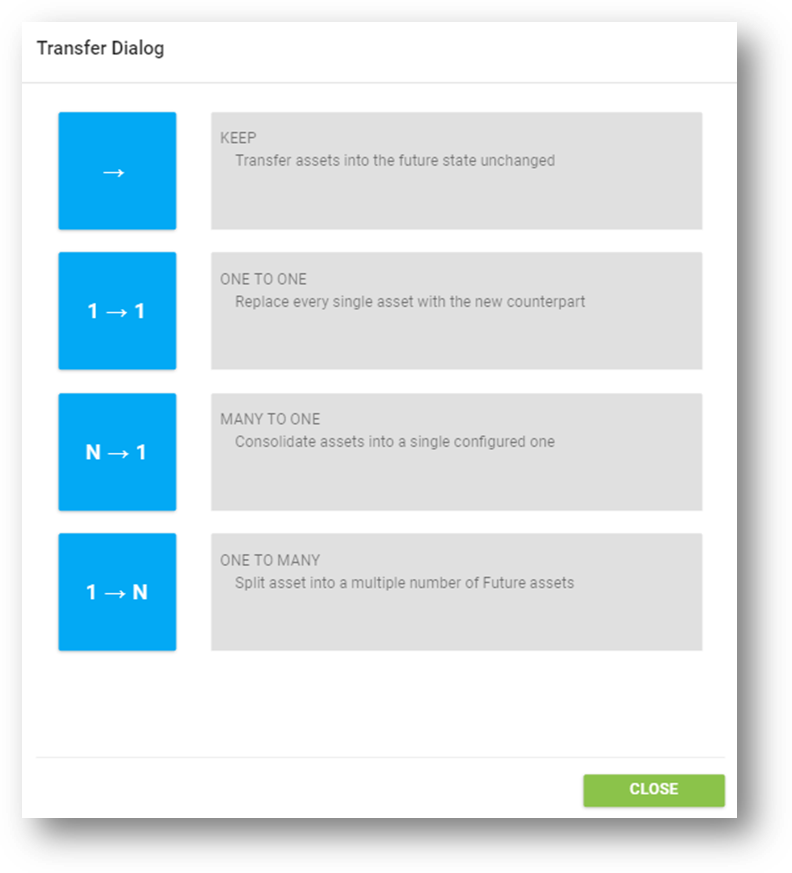
screen shot 14